Note: This tutorial is specifically for using the "Shift Hue" tool. If you're looking to recolor an image in a more standard way, XXTheMichelXX has a tutorial for that here!
In RPG Maker, you can use a hue slider to change the overall hue of a sprite.

But this applies the effect to the entire image-so unless your game features martians, you might find it considerably less helpful for sprites with more colors.

What could we do to take just the green hat, but keep the rest of Red looking normal?
To do this, we'll need two things:
So! We'll open up Red's sprite with PDN. Do you see this section that says layers?
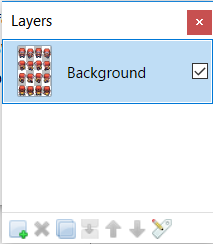
We'll click the button with a green +, to create another layer. And on that layer, we'll paste Red's sprite again, giving us two identical layers.
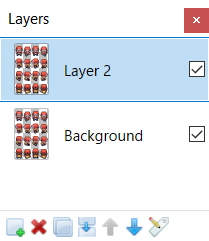
Why did we do that? Because when you're editing with multiple layers, you'll only affect the layer that you're currently on-the other layers will be left untouched. So we can have one spritesheet of Red where we mess with his color, and another where we keep his original.
To open up the hue slider on PDN, press Ctrl+Shift+U. That will pull up this menu.
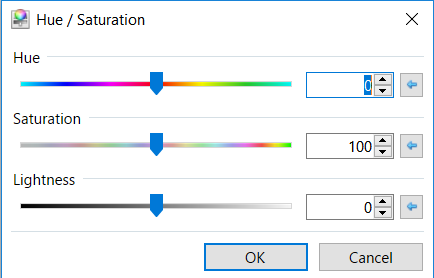
Adjust top layer Red however you want him, and bottom layer will stay the same!
 So now, we just have to erase the parts of top layer Red that we don't want, and bottom layer Red will shine through!
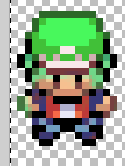
This is where our Grim Color Reaper will come in handy! It can be a real pain to try to erase just the parts that you don't want with PDN's round eraser tool. Things can be a little easier by selecting the Wand tool and using that to select certain sections, but we'd still need to find every time that color appeared- select every arm in a sheet, every face, etc.
The Grim Color Reaper will delete all pixels matching the color currently set as your primary color, meaning you don't have to hunt them down! Use the Color Picker tool (K, the eyedrop icon) to pick out a color that you want deleted. Then, go to Effects->Color->Grim Color Reaper. You'll be met with this:
 You'll want to set Color Tolerance to 20-that will make it where GCR only takes the color in your primary, instead of colors similar to it.
After setting this, you can just hit Ctrl+F to use GCR again with the same settings, even on a different color!
So, we'll pick out all the colors on Red's skin, clothes, etc that we don't want, and we'll be left with just the changes we do!
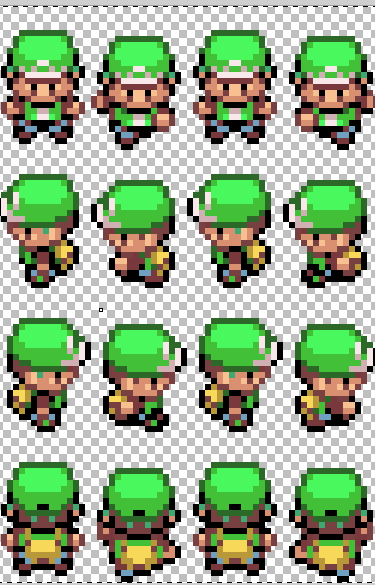
Is he called Green or Blue? I think it depends on the translation.
I chose to keep Red's torso in its new color scheme, but you may want it in the original. That could pose a problem, as it's in the same colors as Red's hat, so GCR would undo that as well. Use the Rectangle Select tool (S) to select just Red's torso, leaving his hat out of the rectangle. GCR will only affect the selected area, leaving his hat unscathed.
Just one last step! Go back to the layers menu, and select the fourth button from the left, Merge Layer Down. This will compress the two layers into one, so that it can be saved as a .png.
This process can be applied to any existing image! You can create a throwing animation for a Poke Ball recolor, new trainer sprites to match new overworlds, or even to create new shinies!
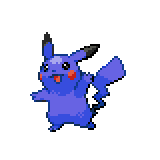
Pikablu? Canon.
We can repeat the process, too, making multiple adjustments to the same sprite!
The one thing this won't work on is any area of the sprite that's white or black, as there's barely any hue to adjust there.
In RPG Maker, you can use a hue slider to change the overall hue of a sprite.
But this applies the effect to the entire image-so unless your game features martians, you might find it considerably less helpful for sprites with more colors.
What could we do to take just the green hat, but keep the rest of Red looking normal?
To do this, we'll need two things:
- The program PaintDotNet. https://www.getpaint.net/ This is a free image editing program, and I'd personally recommend you get it even if you don't use this tutorial for anything-it's just really helpful. You can probably use any other image editing program that has layers for this tutorial, but I'm going to be explaining as if we were using PDN.
- The plugin for PaintDotNet called Grim Color Reaper. https://forums.getpaint.net/topic/15595-grim-color-reaper-plugin/ This isn't necessary, but it will make things much easier.
So! We'll open up Red's sprite with PDN. Do you see this section that says layers?

We'll click the button with a green +, to create another layer. And on that layer, we'll paste Red's sprite again, giving us two identical layers.

Why did we do that? Because when you're editing with multiple layers, you'll only affect the layer that you're currently on-the other layers will be left untouched. So we can have one spritesheet of Red where we mess with his color, and another where we keep his original.
To open up the hue slider on PDN, press Ctrl+Shift+U. That will pull up this menu.

Adjust top layer Red however you want him, and bottom layer will stay the same!


This is where our Grim Color Reaper will come in handy! It can be a real pain to try to erase just the parts that you don't want with PDN's round eraser tool. Things can be a little easier by selecting the Wand tool and using that to select certain sections, but we'd still need to find every time that color appeared- select every arm in a sheet, every face, etc.
The Grim Color Reaper will delete all pixels matching the color currently set as your primary color, meaning you don't have to hunt them down! Use the Color Picker tool (K, the eyedrop icon) to pick out a color that you want deleted. Then, go to Effects->Color->Grim Color Reaper. You'll be met with this:
After setting this, you can just hit Ctrl+F to use GCR again with the same settings, even on a different color!
So, we'll pick out all the colors on Red's skin, clothes, etc that we don't want, and we'll be left with just the changes we do!

Is he called Green or Blue? I think it depends on the translation.
I chose to keep Red's torso in its new color scheme, but you may want it in the original. That could pose a problem, as it's in the same colors as Red's hat, so GCR would undo that as well. Use the Rectangle Select tool (S) to select just Red's torso, leaving his hat out of the rectangle. GCR will only affect the selected area, leaving his hat unscathed.
Just one last step! Go back to the layers menu, and select the fourth button from the left, Merge Layer Down. This will compress the two layers into one, so that it can be saved as a .png.
This process can be applied to any existing image! You can create a throwing animation for a Poke Ball recolor, new trainer sprites to match new overworlds, or even to create new shinies!

Pikablu? Canon.
We can repeat the process, too, making multiple adjustments to the same sprite!
The one thing this won't work on is any area of the sprite that's white or black, as there's barely any hue to adjust there.
- Credits
- None needed for this tutorial! Just remember to credit the source of your sprites!
